Change Search Criteria and Apply Filters
Follow
This article provides an overview of how to Change Search Criteria and Apply Filters to generate the Report Results you want. We’ll also explore how the search criteria, scenarios, and filters work to help you to further modify your Report Results.
In this article:
Change Search Criteria Video Tutorial
What is Search Criteria?
Search criteria is a set of parameters, filters, and conditional terms you can apply to refine your Report Results. It includes the Date Range, Date Type, Job Origin, Client Type, etc. Changing Search Criteria helps you to include a subset of data that you want in your Report Results. Changing Search Criteria is different than editing the Report. You can ONLY change the Report Results and cannot change the columns, Report Name, Report Structure, Report Folder, and other details when you change search criteria, whereas the Edit Report feature allows you to change all those fields.
How to Change Search Criteria?
-
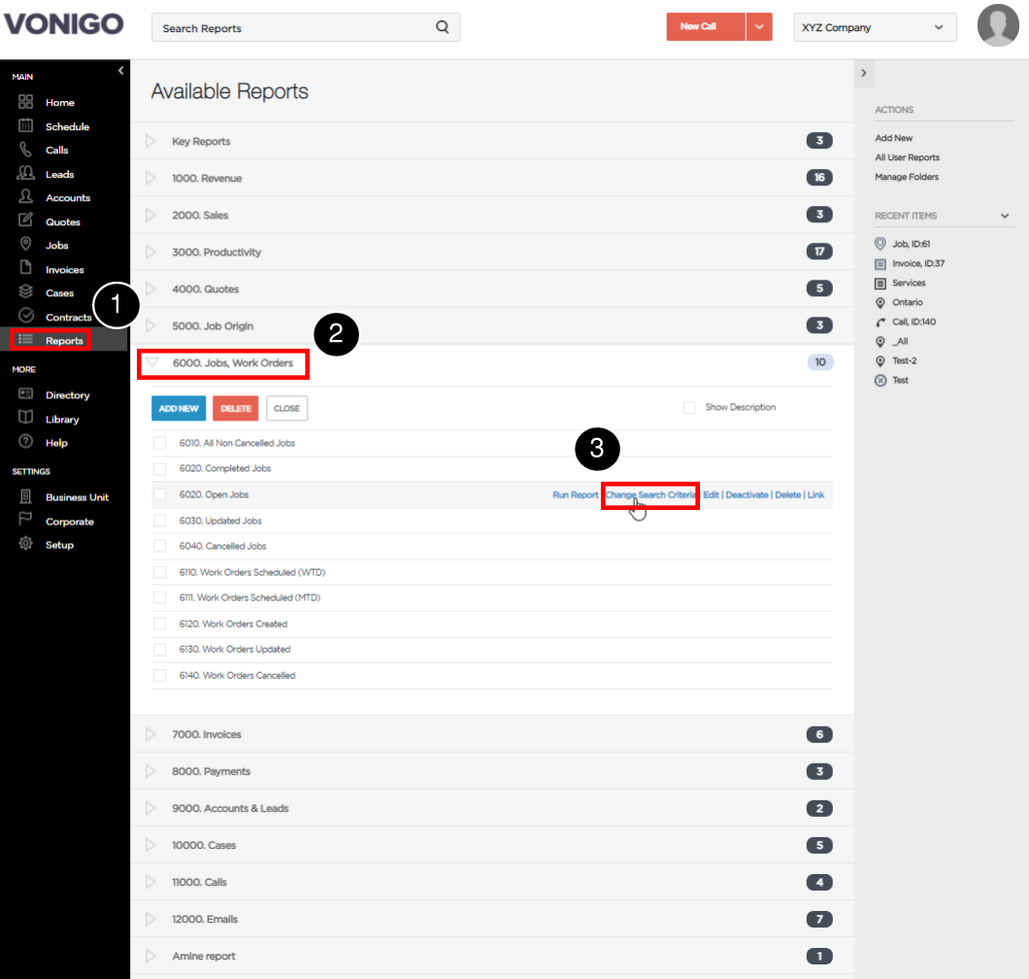
Go to Reports.
-
Click to Folder that contains the Report that you want to access.
-
Hover over to the Report and click Change Search Criteria.
Change the Date Range
-
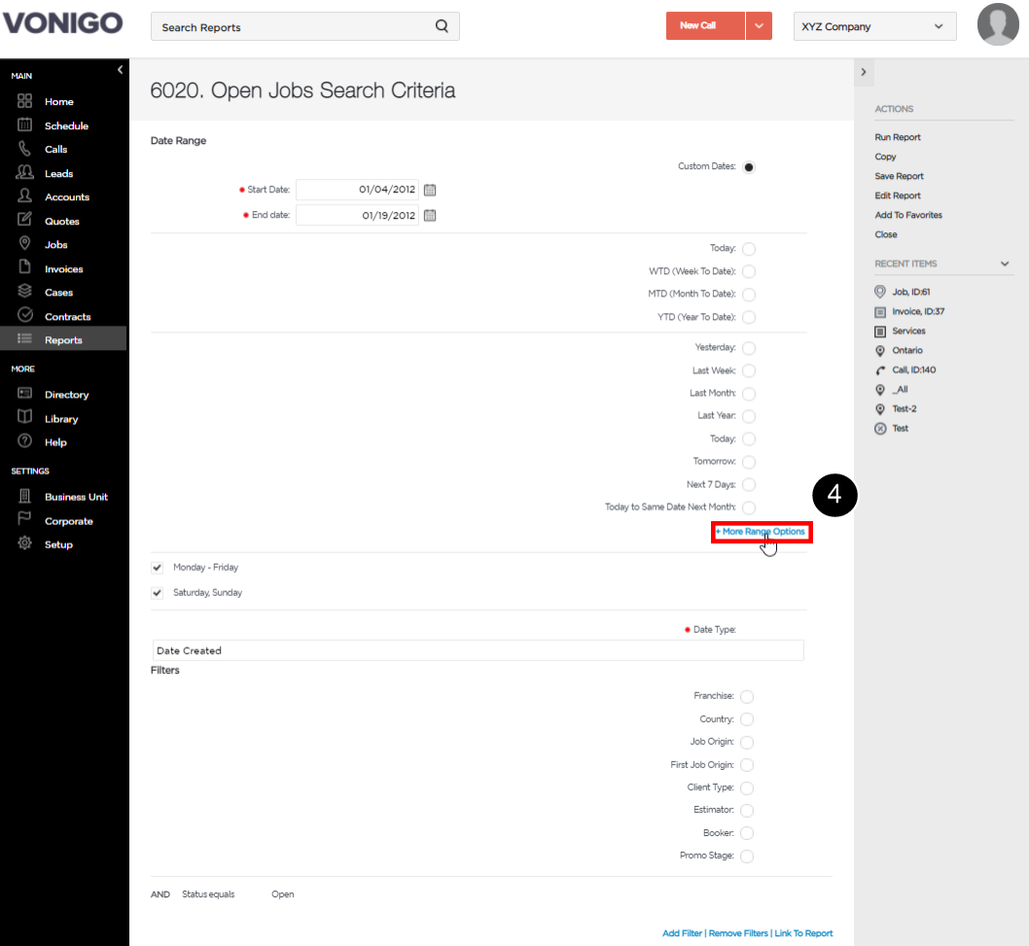
On the Search Criteria screen, there is pre-made list of date range options that you can select to refine your Report Results. To see all the Date Range Options, click + More Range Options.
-
Click on one of the Date Range Options available.
-
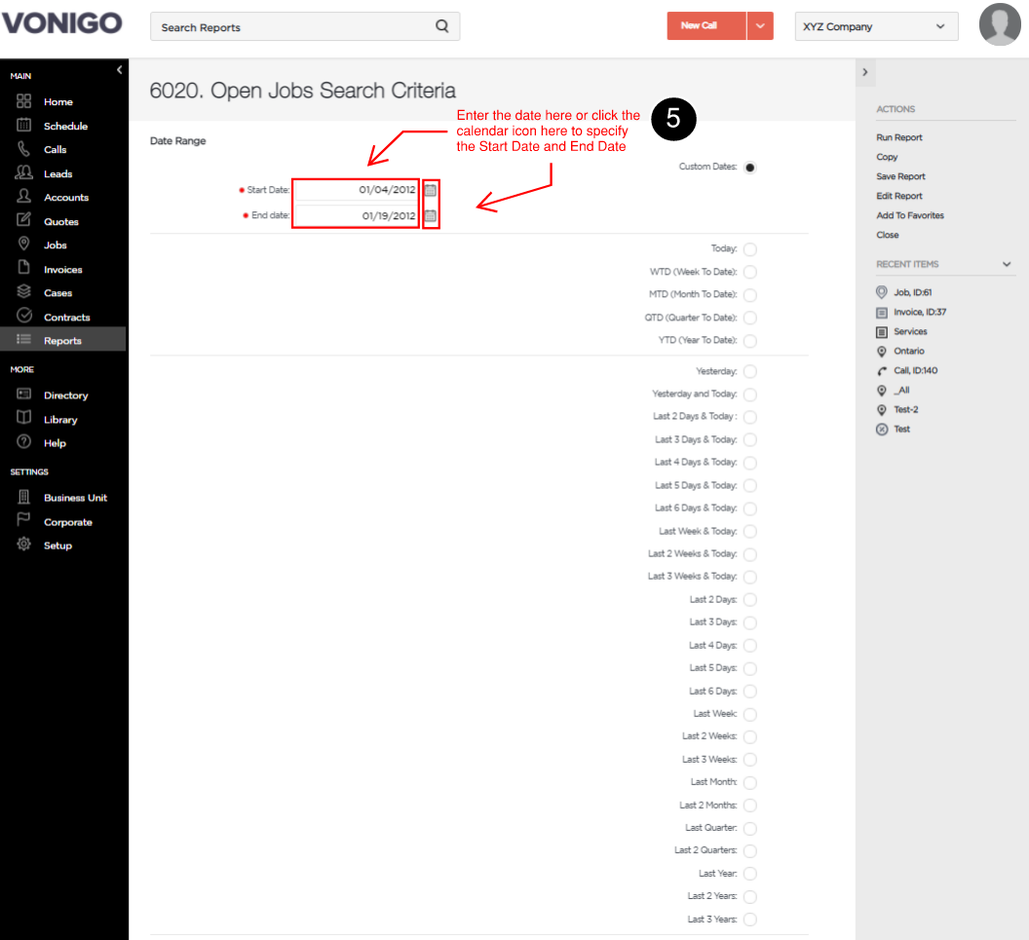
If you click Custom Dates, you need to specify the Start Date and End Date. To specify both of them, you can click the Calendar icon or enter the date in the Start Date or End Date. If not, ignore this step and screenshot below.
-
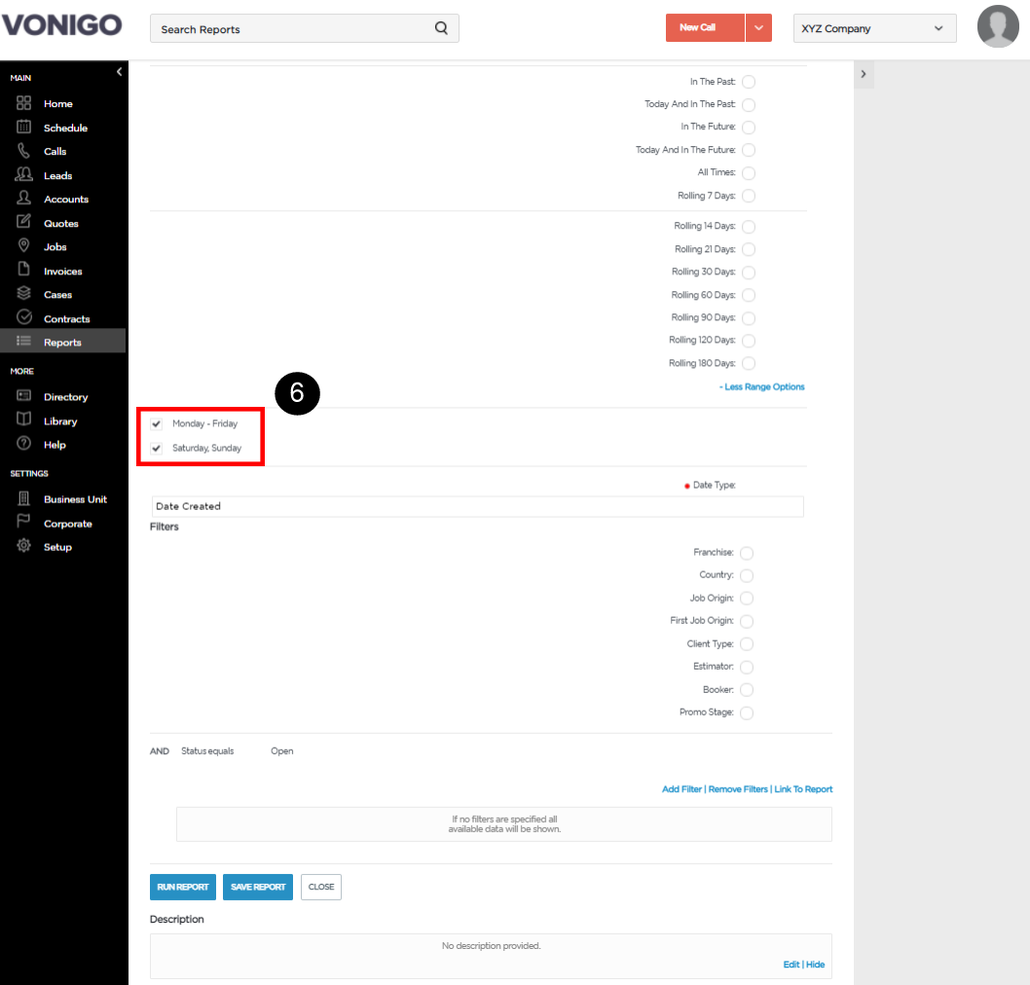
Once you are done selecting Date Range, click -Less Range Options to hide the Date Range Options that you are not selected or you can ignore this step to keep the Options appear.
-
Click one or both Day Type options:
-
Monday - Friday: Results include data for weekdays.
-
Saturday - Sunday: Results include data for weekends.
-
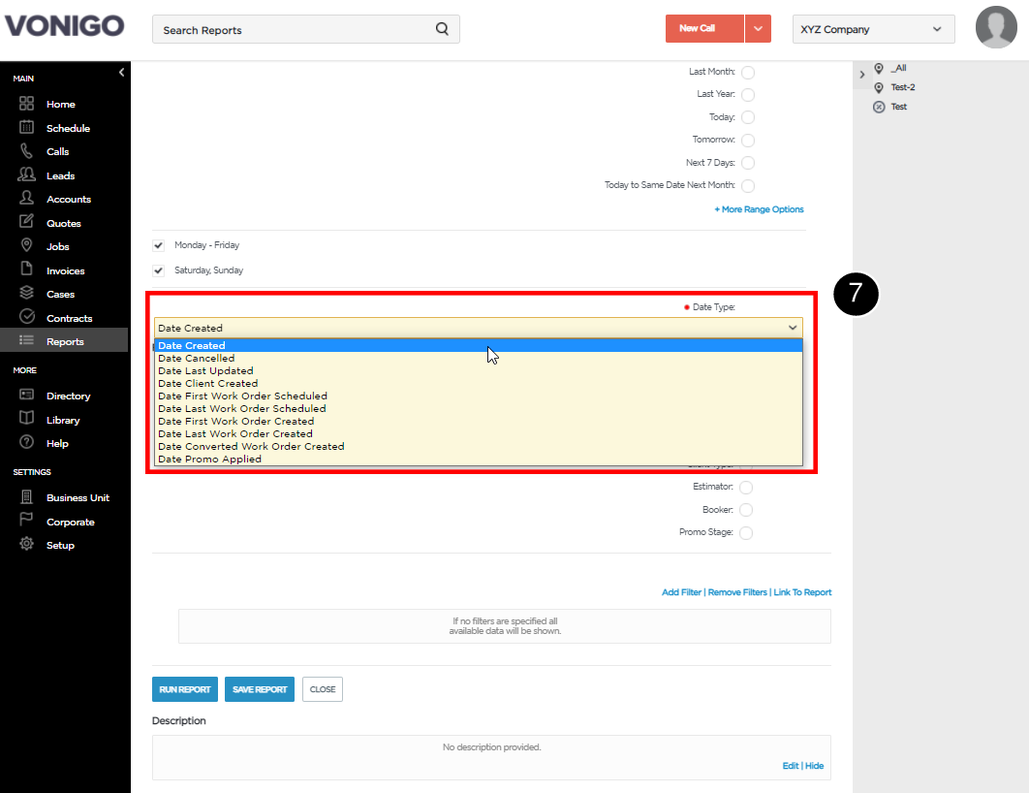
Change Date Type
Date Type is the action or event that occurred during the defined dates. The options available to select for Date Type depend on the Report and Category type. Each Date Type has a pretty straightforward name based on its functions. These are a few examples of the Date Type and its functions:
Note: If you are unsure which Date Type that you need to use, please contact our Customer Success Team to help you determine the Data Type for your Report.
1. Date Created
Generate results when the Category data are entered on specific dates, or within a date range. It can provide valuable insights such as for marketing and call center related activity. For example, the Report Results would be able to indicate the number of Work Orders generated in response to a marketing campaign or during a promotion.
2. Date Cancelled
Generate results when the Category data are canceled on the Schedule. It provides valuable operation insights such as for work management, client retention rate, etc.
3. Date Last Updated
Generate results when the Category data had been updated over a certain time period after being Scheduled, in terms of location, time, duration, charges, etc. It provides useful information for data audits.
4. Date Client Created
Generate results when the Category data are created by Client. It provides valuable operation insights such as for work management, client retention rate, etc.
5. Date First Work Order Scheduled
Generate results when the first work order is scheduled. It provides valuable operation insights such as for work management, client retention rate, etc.
6. Date First Work Order Created
Generate results when the first work order is created by Client. It provides valuable operation insights such as for work management, client retention rate, etc.
7. Date Last Work Order Created
Generate results when the last work order is created by Client. It provides valuable operation insights such as for work management, client retention rate, etc.
8. Date Promo Applied
Generate results when the Client applied for the promo code. It provides valuable operation insights such as for customer churn rate, revenue management, etc.
9. Date Scheduled
Generate results when the Category data occurred on the Schedule. It provides valuable operation insights such as how busy you were during a set time period, and could help you with future resource allocation and hiring plans.
10. Date Invoiced
Generate results when the Category data were Invoiced on specific dates, or within a date range. It provides valuable revenue information to help track income generated from work done.
11. Date Converted Work Order Created
Generate results when the Work Order is created after converting from the Quote.
To change Date Type, please follow the steps below:
-
Click the Date Type drop-down list and select the Date Type that you want.
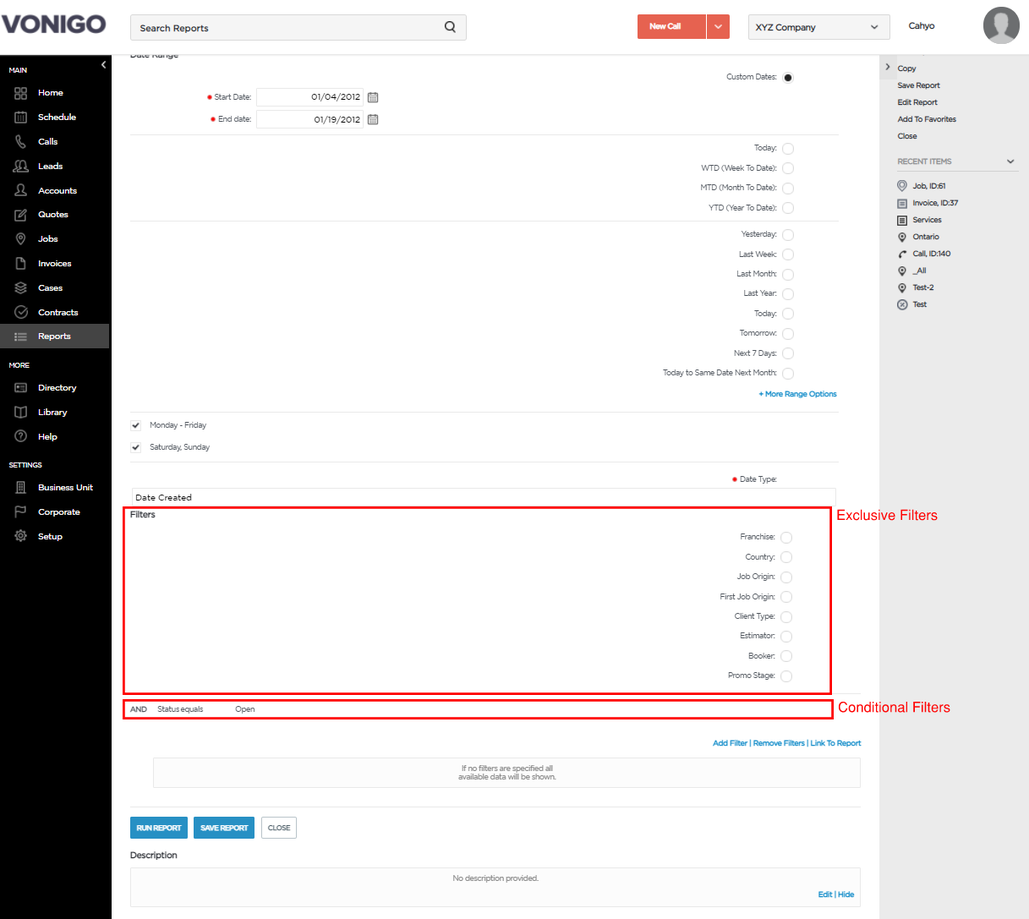
Select Filters
There are two types of filters:
-
Exclusive Filters: You can ONLY choose one of these filters. The exclusive filters are varied depending on the Report and Category Type.
-
Conditional Filters: A group of filters that are being built from the set of conditions or requirements that the Report data must satisfy. You can set this filter by using various conditions available such as equals, not equal to, contains, does not contain, and starts with.
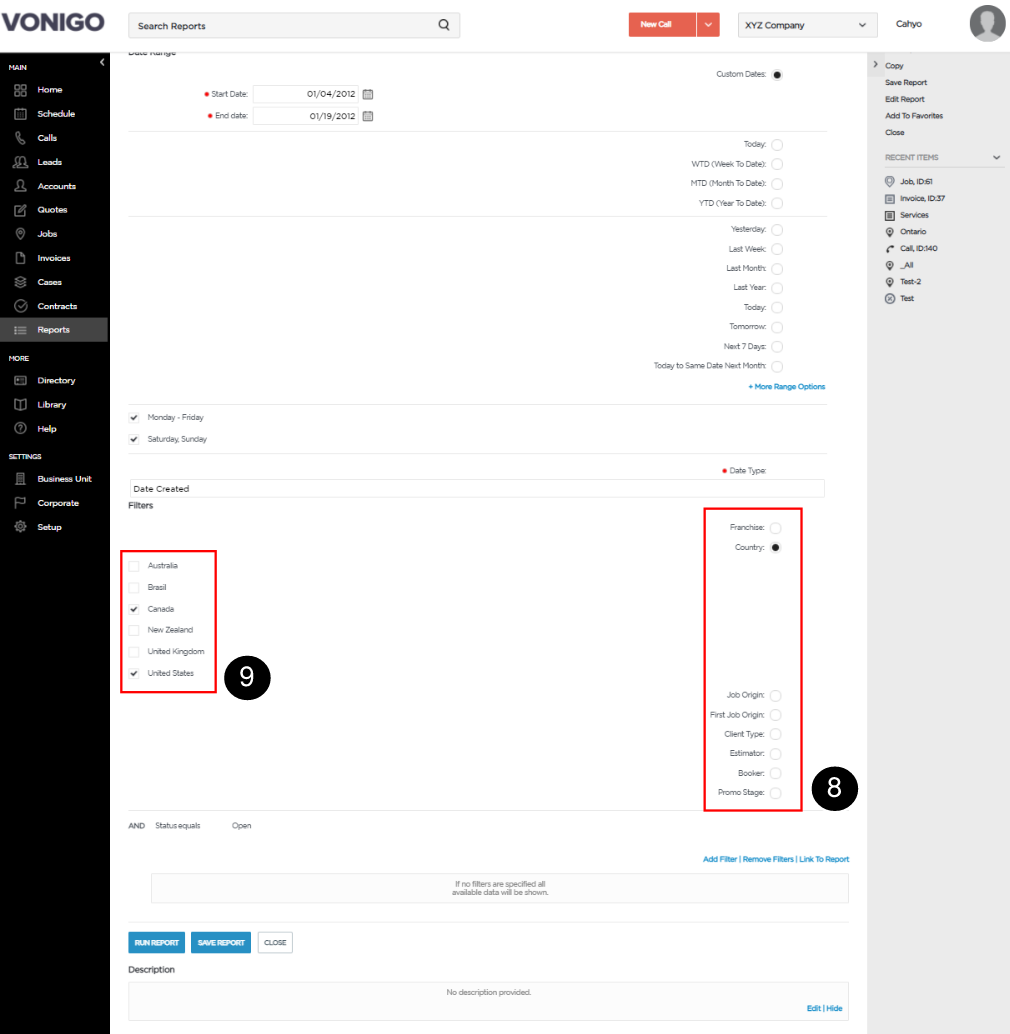
Select Exclusive Filters
Note: In these steps, we'll be selecting filters based on the Country.
To select exclusive filters, please follow the steps below:
-
Click one of the Filters.
-
Click one or multiple subfilters.
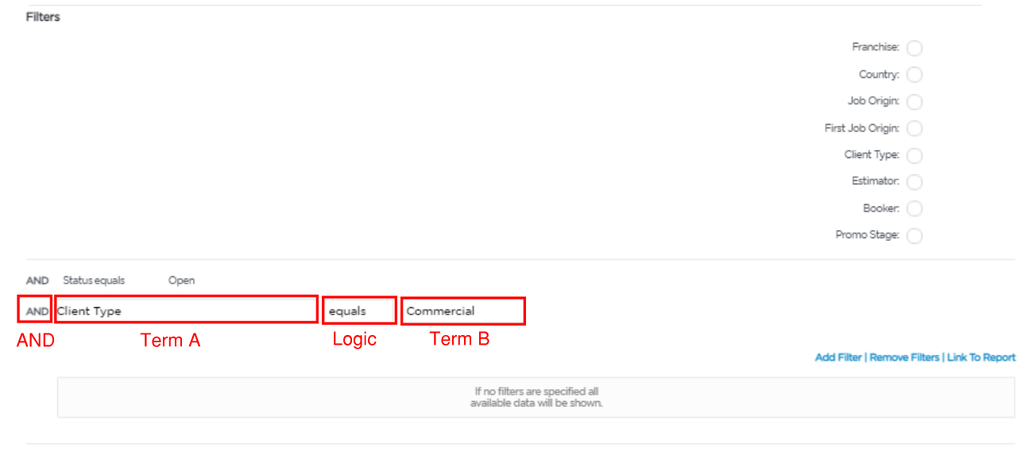
Select Conditional Filters
Note: In these steps, we'll select the conditional filters based on the Client Type.
-
AND: A statement that means the Report ONLY includes Results that satisfy ALL of the conditional statements. You cannot change this statement.
-
Term A: The first term for the conditional statement. You will select this term from the drop-down list based on the Report and Category type.
-
Logic: A logic statement that connects between terms A and B and defines how the conditional statement will generate the Report Results. This logic statement varies depending on the Term A field including equals, not equal to, contains, does not contain, starts with, etc.
-
Term B: The second term for the conditional statement. Depending on the term A field, you will select term B based on the drop-down list or fill the blank box.
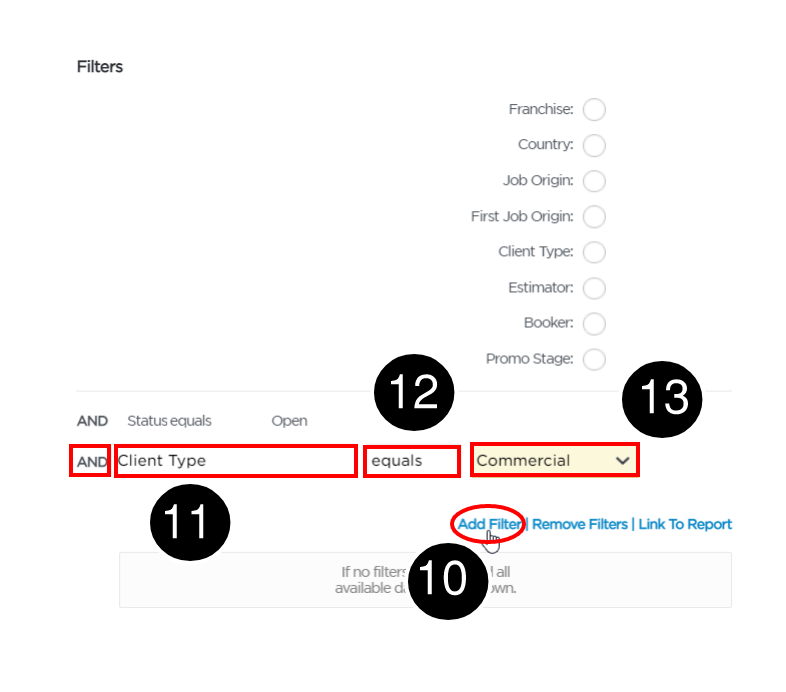
To select conditional filters, please follow the steps below:
-
Click Add Filter.
-
Select Term A from the drop-down list.
-
Select Logic from the drop-down list.
-
Select the drop-down list or fill in the box for Term B.
You can use Remove Filters to remove BOTH exclusive and conditional filters.
Apply Changes: Run or Save
Once you are done, you can save and run the Report by clicking Save Report > Run Report.
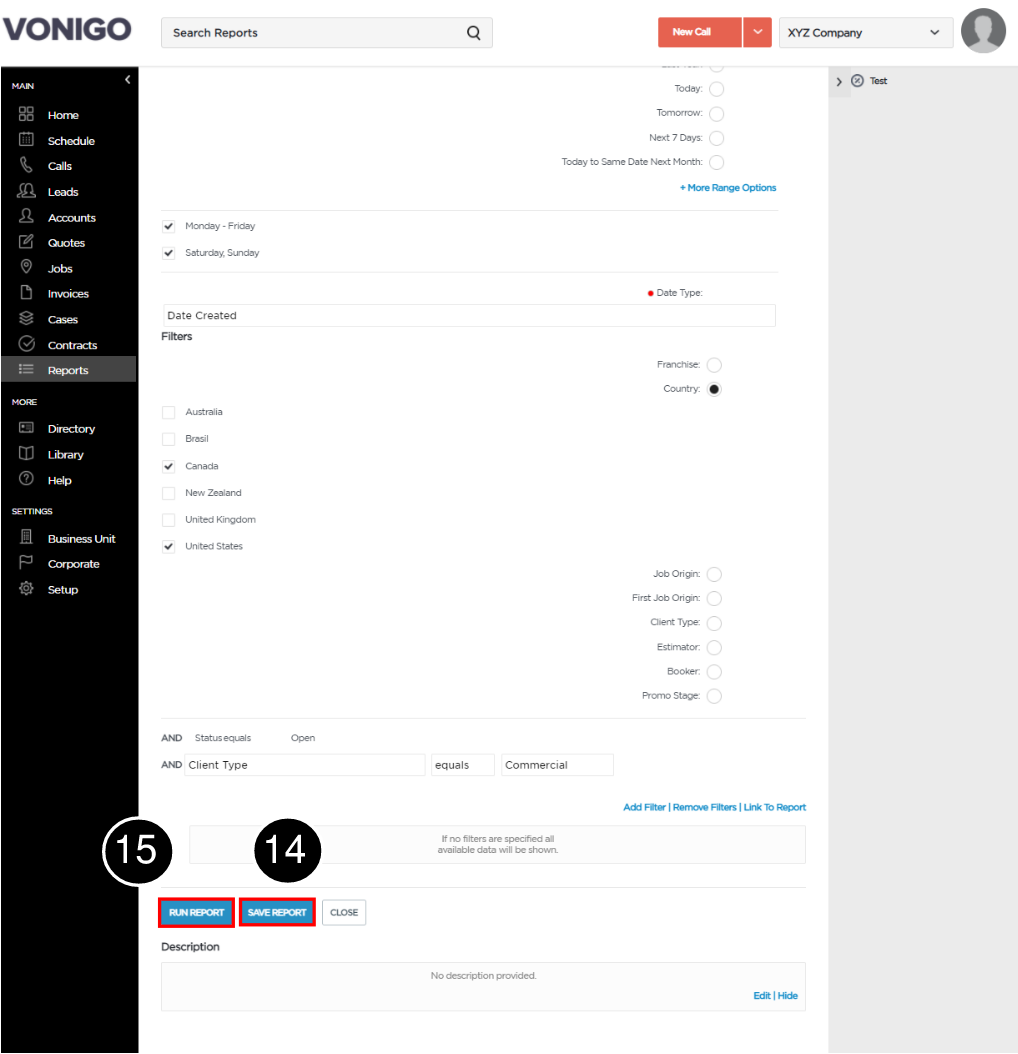
If you want to generate Report Results without saving the changes on the Report criteria, you can just click Run Report directly without clicking Save Report.